LeggNets Digital Capture

Thursday, January 31, 2008

Reflector Lighting in Mid-Day Sun


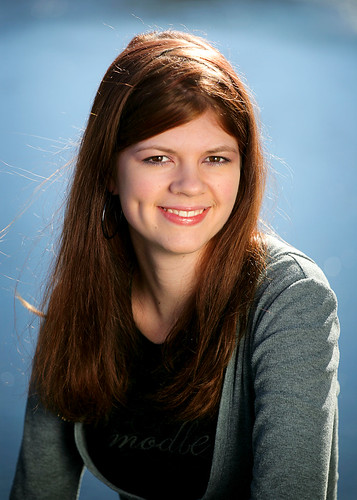
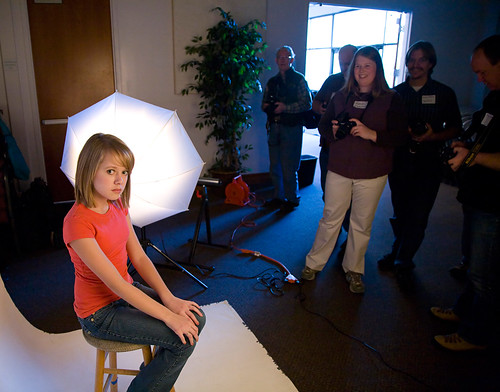
Pro photographer and instructor Kenneth Linge had another of his Photographing People clinics this past Saturday in Salt Lake City. I was privileged enough to be invited again to help out and photograph during the class. Kenneth is a master at using mid-day sunshine with a reflector to create stunning portraits.

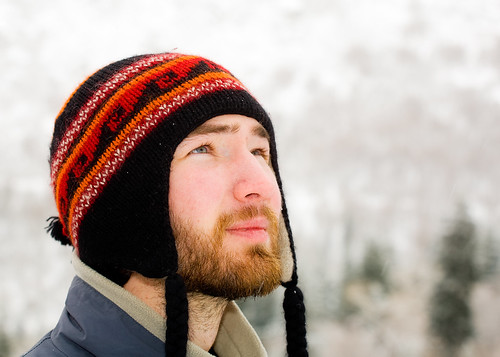
I took the above photo of Lindsey in direct overhead sunshine in the parking lot of the hotel the seminar was held at. The lighting was provided by a single silver reflector positioned by Kenneth. The combination of the warm light on the face with the cool background bokeh created a pleasant portrait.

Here is an overview of the scene as captured by my favorite videographer Jeremy Hall.
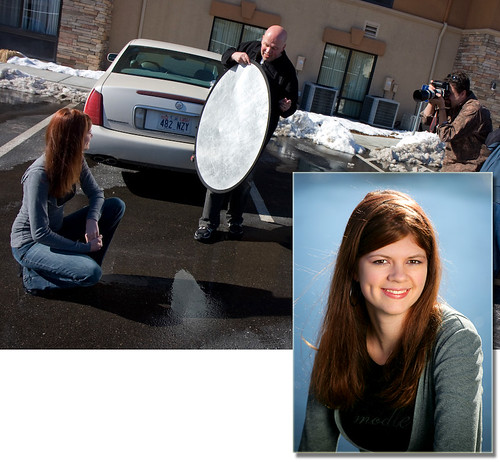
Behind the Scenes - Kenneth Linge's class in Salt Lake City

It is always rewarding to be able to capture a nice portrait such as this in an environment that many photographers would consider inhospitable to portrait work.

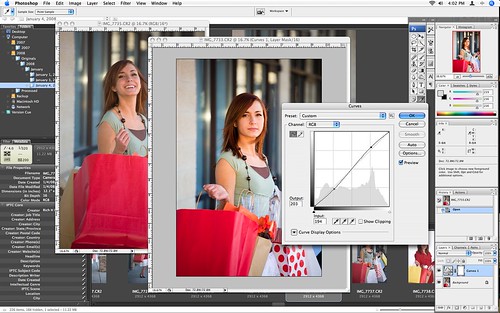
On a somewhat related side note, I processed this image in under 5 minutes using Kenneth's Photoshop Actions. I will be providing more information on these actions in the near future.

On the web:

Kenneth Linge
Jeremy Hall

Canon 5D, Canon 70-200 f/4L lens - 1/800 second, f/4, ISO 100

Labels:

Wednesday, January 30, 2008

Vice Squad


Canon 5D, Canon 24-105 f/4L lens - 1/160 second, f/11, ISO 100

Tuesday, January 29, 2008

Climbing the Ice


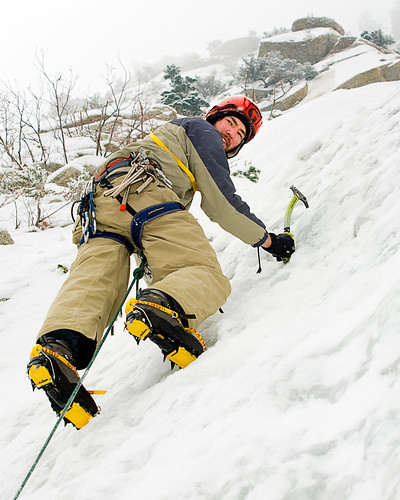
I recently joined some local ice climbers for the opportunity to photograph them ascending a frozen waterfall. Photographing people against the bright snow/ice background can be challenging exposure-wise. To keep the subjects from becoming too dark in the image, I adjusted my camera's meter to overexpose by one-third f/stop and used a strobe set at minus one-third f/stop for filling in the shadows.

The exciting part of taking this shot was the small icy ledge that I was perched on while wearing ice climbing gear.

Canon 5D, Canon 70-200 f/4L lens - 1/80 second, f/9, ISO 50

Monday, January 28, 2008

Working Nine to Five


Today's image is from last Friday's stock shoot with one of my favorite models Alyssa. When planning a photo shoot, I map out a list of ideas for shots ahead of time. The overwhelmed office worker concept was one of the main themes for this session and Alyssa did a great job of pulling it off.

A few technical notes: This was shot with at a medium wide-angle focal length (40mm on a full-frame) to give depth between the model and the files in the foreground. I opted to spotlight the white background rather than make it pure white to have a bit of uneven vignette. Lighting was a single softbox left of camera with a silver reflector to the right of the model (plus the background light).

Canon 5D, Canon 24-105 f/4L lens - 1/160 second, f/8, ISO 100

Labels: ,

Saturday, January 26, 2008

Photowalking Utah - Video

Jeremy Hall was kind enough to shoot and edit a video from our last Photowalking Utah event. This was the indoor photowalk featuring studio lighting.


Thanks for the hard work on this Jeremy, it turned out well.

Labels:

Friday, January 25, 2008

When Life Gives You Lemons . . .


A Photographer's Creed:

"When life gives you lemons, make lemonade slice them up and take a picture."


Canon 5D, Canon 24-105 f/4L lens - 1/160 second, f/9, ISO 100

Thursday, January 24, 2008

Holly


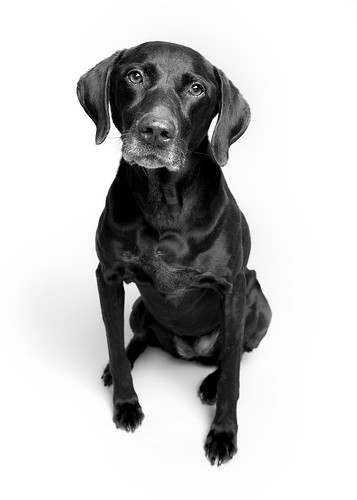
The rapt attention a photographer can elicit from a subject with a single piece of cheese is somewhat amazing. Though, I find this method works best with participants of the four-legged variety.

Canon 5D, Canon 24-105 f/4L lens - 1/125 second, f/8, ISO 100

Wednesday, January 23, 2008

Colorful Shooting on a Grey Winter Day


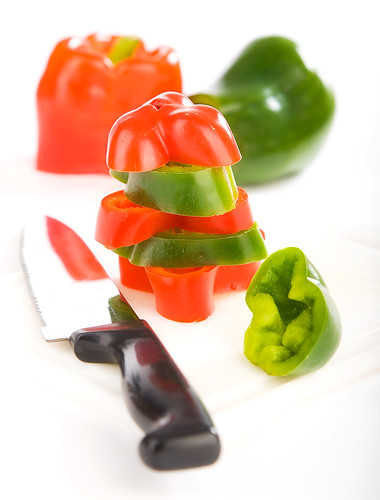
It was another grey day in Northern Utah this past Saturday when I decided to spend some time photographing. I wanted something colorful to shoot, so I stopped by the produce section of the local supermarket in search of cheap color. I found it with these red and green bell peppers.

This arrangement of the freshly cut peppers on a cutting board was shot in studio using four lights. I used a high key arrangement of two softboxes for main light (one on each side of the camera), a small softbox for a rim light and a monolight onto white seamless for the backdrop. My favorite part of the shot is the separation caused by the rimming of light on the top of the red cut pepper.

And when I finished shooting, I had a healthy snack.

Canon 5D, Canon 24-105 f/4L lens - 1/160 second, f/8, ISO 100

Tuesday, January 22, 2008

Photographing People Seminar with Kenneth Linge


I had a conversation yesterday with my friend Kenneth Linge. Kenneth is a world class wedding and portrait photographer as well as a photography instructor. In chatting with him about his upcoming seminar (Photographing People, Part 1) this Saturday in Salt Lake City, he mentioned that there were still some spots available. Being someone who is always on the lookout for something to blog about, I freely offered to pass along the info.

I have attended two of Kenneth's classes in the past year. I find it amazing that a photographer of his level is so willing to freely share the techniques that he has learned in 30+ years as a working pro. Scott Smith (a photographer I met through this blog) attended Kenneth's last class in Salt Lake City. Here's a little bit of what he had to say about it on his blog:

"Kenneth teaches seminars in the US and Europe. He successfully completed five European tours last year. Kenneth and his wife Marylyn taught the class of 15 students. Their class was structured in a way to teach some basic fundamentals with techniques they use and build upon them in upcoming seminars. One of the highlights for me was to participate in a live model shoot in downtown Salt Lake City. It was amazing to watch Kenneth look for the natural available light and apply it to create some amazing photographs."

If you're interested in learning more about the seminar (and possibly attending), pop on over to Kenneth's website for more into: http://kennethlinge.com/seminars.html

And when you decide to attend, you can see yours truly in action. I will be there photographing the photographer :)

Monday, January 21, 2008

Dream a Little Today


I selected this image for today's post in hopes of making an ever-so-subtle reference to the holiday in the US today honoring the late Reverend Martin Luther King, Jr.

Early morning, April 4
Shot rings out in the Memphis sky
Free at last, they took your life
They could not take your pride

- U2

Update: When I refreshed the blog after making the post, I was surprised to see the resemblance between today's image and the post I made on Saturday. I hadn't noticed that until now.

Canon 5D, Canon 24-105 f/4L lens - 1/100 second, f/10, ISO 100

Saturday, January 19, 2008

Focus


Canon 5D, Canon 70-200 f/4L lens - 1/80 second, f/7.1, ISO 100

Friday, January 18, 2008

Calling Photoshoppers - My Version


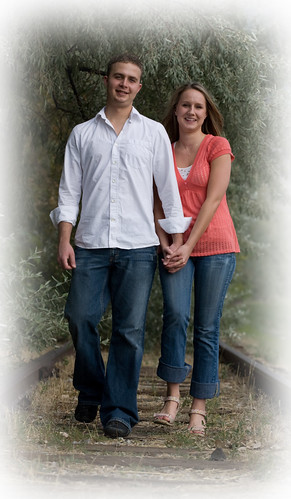
It was great to see the response to the Calling Photoshoppers project we featured this week (original post). I received a few suggestions that I give a shot at editing the image, so I spent a few minutes with it this morning. Here is my version.

I didn't keep a detailed list of my editing steps (like the others did so well), but I will touch on a few highlights.

- Cropped and leveled
- Removed rock (thanks Brian)
- Blended two versions of the images, one sepia and one color
- Warmed up and softened using an action
- Brightened faces
- Vignette

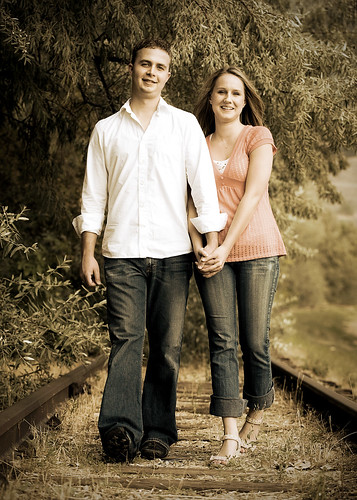
My goal was to create a sepia image with a subtle color on the couple (especially the jeans and her top). Similar to others, I sought to create an old-fashioned feel to the image.

So, how'd I do?

Canon 5D, Canon 70-200 f/4L lens - 1/250 second, f/5, ISO 100

Labels: ,

Thursday, January 17, 2008

Hanging Around in the Studio


How do you get a picture like this? You finish up photographing a strapping young man with his rock climbing gear, when your daughter asks if she can try the rappelling rig you've hung from the studio rafters. Fun.

Canon 5D, Canon 24-105 f/4L lens - 1/125 second, f/11, ISO 100

Wednesday, January 16, 2008

Calling Photoshoppers - The Results


Last week I put out a call for Photoshop users who would like to put their skills to work on one of my images (original post). I received a very nice response and selected the first five to participate.

I have since received the four edited images (one person was unable to complete the assignment). In addition to doing a great job applying their Photoshop chops to the image, they each wrote a narrative on what they did and why they did it. It is very interesting for me to see the different style and approach each artist took.

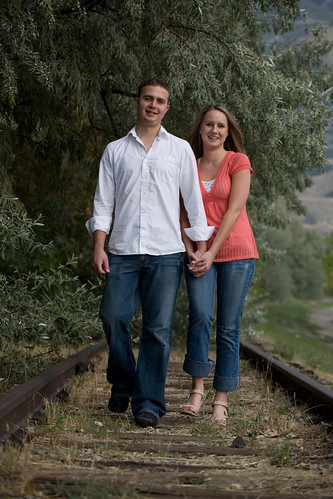
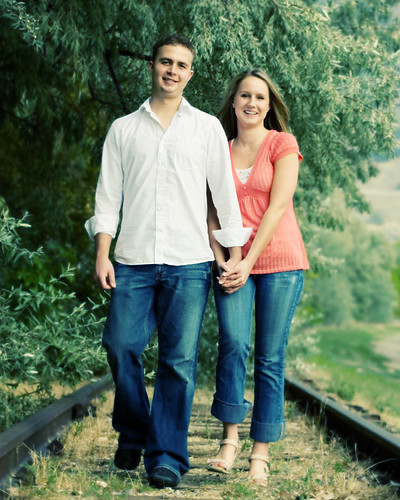
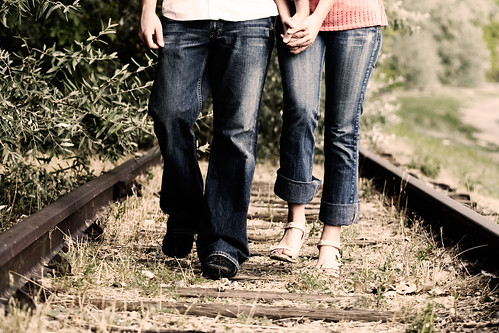
Each person was provided with an unedited JPG and RAW image (shown above) of the couple walking on abandoned railroad tracks. The only guideline given was that they could do whatever they wanted. Here are their results in no particular order.

ANN TORRENCE

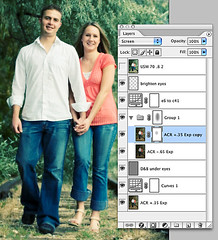
Calling Photoshoppers - Results

Technically

In short - two Adobe Camera Raw interpretations of the same image,
over and under exposed. The diffusion is simulated by copying the
over-exposed image, blurring it, and using the Screen mode.
Calling Photoshoppers - Results
The under-exposed ACR conversion is blended with Multipy at a partial
opacity to bring back the dark zones. A Curves Adjustment Layer
introduces the Cross Processing look; search on-line for many cross
processing curve examples to download. One more thought: edit in 16-
bit mode when making dramatic shifts and expect a spiky histogram.
Down-sampling to 8-bit will smooth much of the spikiness out.
Cropped to 8x10, light sharpening for Rich to resize and sharpen for
printing.

Artistically

I imagined this couple would like one image from their engagement
session styled for fashion. I wanted to give them an image that they
will like now, their kids will laugh at on their 25th wedding
anniversary, and treasure on their 50th.

I liked the pose, motion and expressions, and how the color of her
shirt pops out of the image. But their beautiful skin and hair tones
get lost in the muddy colors of the tree leaves. And the unfocused
weeds at the bottom of the image have to go (Rich was smart to keep
the camera plane parallel to the couple, and allow some room in the
composition for cropping.)

Cross-processing refers to an old-school color film technque of
processing slide film as if it were color negative or vice versa. It
gives a characteristic color shift and contrast transformation to the
film, and has been used a lot in fashion photography. Another tool
fashion photographers might use is a diffusion filter. Since Rich
didn't use one on his lens, I faked one. I wanted to use both ideas;
retaining a full range of brightness called upon a bit of Photoshop.


BRIAN AUER

Calling Photoshoppers - Results

Technically

I processed the RAW file using Adobe Camera Raw 4.3.1. I left the white balance as shot, and I started with the “Auto” adjustment for the exposure settings. I tweaked a few minor things, then I got started in Photoshop CS3. Once in Photoshop, I applied a curves adjustment layer to increase contrast. Then I converted to black and white using the Channel Mixer adjustment layer at 34% red, 66% green, and 0% blue. I set the blending mode of this adjustment layer to “Overlay” and dropped the opacity to 80%. Then I desaturated the image using a Hue/Saturation adjustment layer by dropping the Saturation slider to -35. The final adjustment step was a Photo Filter adjustment layer using an LBA Warming Filter at a density of 35%. Then I cropped the image (see why in the next section). And finally, the rock in the foreground was a little off for me, so I cloned it out. No sharpening was applied.

Artistically

I felt the scene had a lot of potential and I knew I wanted the image to have a kind of timeless and carefree look and feel to it. The adjustment layers got the overall mood where I wanted it, but the composition was off for me. I loved the slight tilt in the image, but the upper half of the scene wasn’t working for me – the background was too dark on the left and too light on the right. It added too much tension and took away from the “carefree” feeling I wanted. So I played around with different crops and I finally landed on a 3:2 aspect that cut off just below the cuff of the white shirt on the left arm. To me, this was the most interesting part of the image (no offense to the models… or Rich for that matter). The photo was suddenly more timeless and relatable. It wasn’t about the two specific people in the photo -- it was about the carefree feeling of walking down the old tracks on a sunny summer afternoon, hand-in-hand with the person you love.


RICHARD MILES

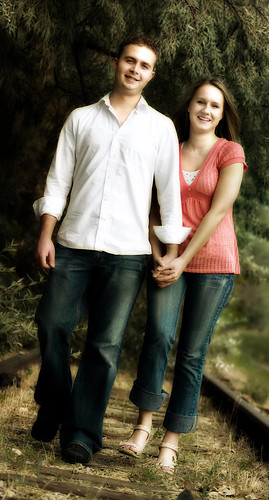
Calling Photoshoppers - Results

Technically

My first step was to eliminate some of the empty space around the couple, so I cropped the image to bring the couple forward. I then tilted the image to take away the linear power that the original had, and also in hopes adding a more visual element to the picture. Overall, I felt the image had too much space around it, and was too much on the straight and upright!

Artistically

I bumped the contrast a little! I also played with different levels of contrast and decided that since the couple are wearing jeans containing pattern and texture , to bring out that element and use that as a unifier that this is a "couple"!

I then added a soften glow to the shot, and then layered a sepia toned layer on top. I took a black paint brush at around 2% opacity and painted over the whole image to achieve that black/sepia combo and add a little warmth and hopes of a romantic flair.


TIM MILLER

Calling Photoshoppers - Results

Calling Photoshoppers - Results

ARTISTICALLY

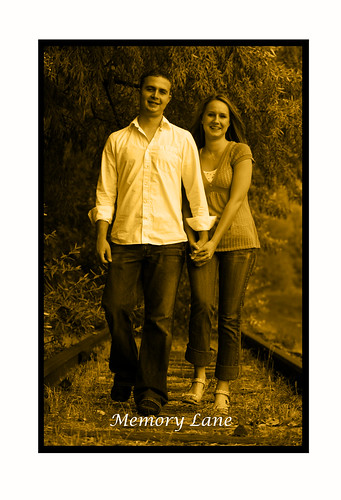
I looked at the photo and it seemed to be a pretty candid shot snapped mid action, but when I thought about it from the perspective of the couple, there was obviously going to be some memories associated with the event. It was obviously a staged candid shot. The railway tracks and the way they were dressed and walking holding hands suggested that a photographer had set this shot up for them – maybe as a anniversary special photo occasion or something. So while wild fantasies of photo shopping an old fashioned steam train in behind them to make them look as if they were in danger crossed my mind (in fact I even found some suitable photos) I didn’t attempt this. Instead I reasoned that the couple would be interested in framing this photo on their wall as a memory of this event or time in their lives. So I created two different looks and borders that would lend themselves to printing on canvas or photo paper and framing with a nice frame.

TECHNICALLY

Shot 1 – the sepia image. First I tightened the shot by cropping substantially. I then copied this onto a larger white canvas to create a large margin. I then changed the image to black and white using a gradient adjustment layer and then added a colour adjustment layer of sepia. I then created a slightly larger selection in the background and filled this with black to give the old time real photo look of the black edges and sepia tone. I then added the text at the bottom. This would look good in an old wooden frame – probably 2-3 inches in width in an old fashioned style.

Shot 2 – the soft edges. Once again I tightened the shot by cropping the extraneous material. I then create a border inside the edge and feathered this by 170 pixels. I then selected the inverse and deleted to create the soft edges. This would look good on a matt photo paper and framed in a thin metal frame, gold or maybe silver.

____________

And there you have it. I would again like to personally thank each participant for taking the time and energy to be involved in this little project. Based on the response, we will be doing this again in the future.

Labels: ,

Tuesday, January 15, 2008

iStockphoto Download #10,000


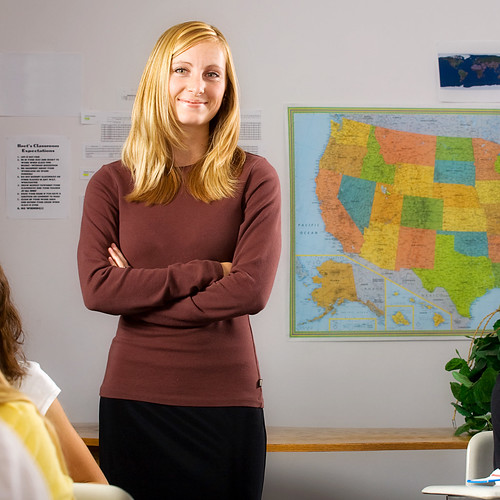
Today marks a milestone in my stock photography. Just a little while ago this image of Jenna as a school teacher sold on iStockphoto.com marking my 10,000th photo sold on the popular stock photography website. This advances me to a Gold Level contributor and not only entitles me to a higher royalty payment percentage, but I am now eligible to also sell my stock photography via Getty Image's (the parent company of iStockphoto) royalty free collection.

Shooting and selling stock images has grown over the past year from a small part of my photography to becoming the major focus. During that time the income I receive from sales has increased to where it is now the majority of my monthly revenue.

I look forward to the year ahead as I now set my sights on iStock's Diamond Level of 25,000 downloads.

If you'd like, you can click HERE to view my stock portfolio.

Canon 5D, Canon 70-200 f/4L lens - 1/60 second, f/10, ISO 100

Labels:

Monday, January 14, 2008

Photowalking Utah: Studio Photography - Recap


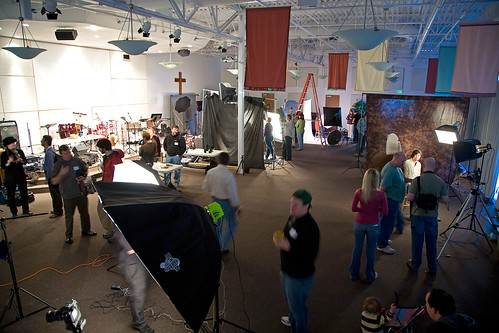
What happens when you put 75 photographers, 8 studio lighting setups, 9 models, a gear tryout table and 25 door prizes in a 6,000 square foot church auditorium? The answer is simple - a great photographic time!

Last Saturday's indoor photowalk was a rousing success. With the addition of the Utah Photo Safari & Salt City Photo club members joining the Photowalking Utah regulars, the energy in the room was incredible. The participants got a chance to walk among the different lighting setups and to shoot the various models while meeting and talking with fellow shooters.

Studio Photography Photowalk - Behind the Scenes 2

Our good friend Berkely at Pictureline hooked us up with plenty of Nikon and Canon swag for the prize table. Many a photographer walked away with more Canon and/or Nikon goodies than they arrived with.

To take a look at the 150+ photos (posted so far) in the Photowalking Utah Flickr group, visit flickr.com/groups/photowalkslc.

Special thanks go out to Gateway Community Church for the use of their building, Pictureline for the prizes and to all of the folks who brought gear and muscles to set-up and tear down the room. It was great to hear from the church that they felt we left the room in better condition than we found it.

The triumvirate leadership of Photowalking Utah is busily planning the next two events. Stay tuned here or at PhotoWalkingUtah.com for details.


Update: Here are a few other articles and/or blog posts on the event:

http://www.photowalking.org/2008/01/14/photowalking-utah-indoor-studio-wrap-up/
http://www.anntorrence.com/blog/2008/01/photowalking-studio-workshop-l.html

.

Labels: ,

Saturday, January 12, 2008

Saturday Morning Joe


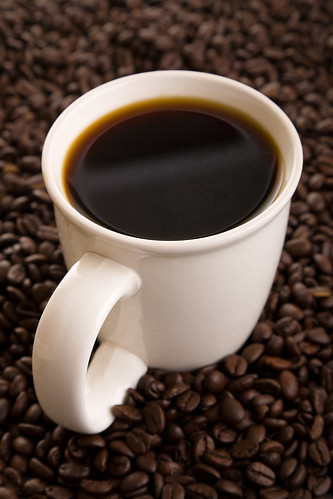
Canon 5D, Canon 70-200 f/4L lens - 1/125 second, f/13, ISO 100

Friday, January 11, 2008

One Shopping Day Left


Only one shopping day left before the January edition of Photowalking Utah. Here are some links with details:

http://www.leggnet.com/2008/01/studio-photography-photowalking-this.html
http://www.anntorrence.com/blog/2008/01/photowalking-reminder-portrait.html
http://flickr.com/groups/photowalkslc/discuss/72157603442844313/
http://www.leggnet.com/2007/12/save-date-photowalk-5-january-12-2008.html


Canon 5D, Canon 24-105 f/4L lens - 1/125 second, f/10, ISO 100

Thursday, January 10, 2008

Studio Photography Photowalking This Saturday


We are having our January Photowalking Utah event this Saturday. This will be an indoor event with multiple sets for doing studio photography. Based on the response in the Flickr discussion, it looks like we are going to have a HUGE turnout. This should be fun.

Here are the details:

When: Saturday January 12, 11:00 am - 1:30 pm (ish)
Where: Gateway Community Church - 584 E. 12300 South, Draper UT 84020

As always, these events are open to anyone interested in attending - regardless of skill and/or equipment level. If your camera has a flash, we will be able to sync you to the lights.

I have scheduled six amateur models to be available to pose for the photographers. We are asking each photographer to make a $5 recommended donation to compensate these models for their time.

For more information, visit the group page at www.photowalkingutah.com or read my previous post by clicking here.

Feel free to contact me at rich(at)leggnet.com or (801) 259-3500 with any questions.

I look forward to seeing many of you on Saturday.

UPDATE: I just came from my favorite photography store Pictureline where I picked up the door prize donations. They have generously offered up over 20 items including Nikon thumb drives, Canon memory card holders, Nikon coffee mugs and much more. These will be given out by random drawing at the event. Please keep Pictureline's generosity in supporting this event in mind the next time you need to make a photography purchase.


Labels: ,

Wednesday, January 09, 2008

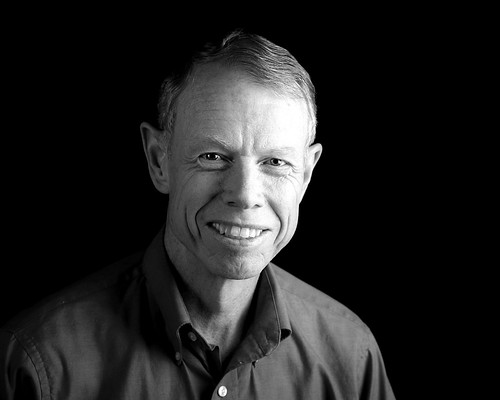
Don


Canon 5D, Canon 24-105 f/4L lens - 1/125 second, f/6.3, ISO 100

Tuesday, January 08, 2008

Calling Photoshoppers


My college age son spent some time with us over Christmas break and offered up a suggestion for a blog post here on LeggNet's Digital Capture. He thought that it would be interesting to see different photographers' final version of the same photograph after editing. I agreed that it would be cool, so we are going to do it.

I am looking for five blog readers that would like to put their Photoshop chops to work on an image that I supply. They will each have one week to do whatever they would like to the image. In the end, I will post all five images along with the photographer's commentary on what they did and why.

If you are interested in participating, please email me at rich(at)leggnet.com with the subject of "COUNT ME IN!". I will take the first five respondents.

This will be fun!


UPDATE


We've got our participants who will each be receiving the un-edited image in the next day. I can't wait to see the results.

UPDATE 2

The image file has been delivered to each of the participants. I anticipate posting the results along with their comments by the middle of next week.

UPDATE 3

The results are posted: http://www.leggnet.com/2008/01/calling-photoshoppers-results.html

Labels:

Monday, January 07, 2008

TTV Photography Revisited


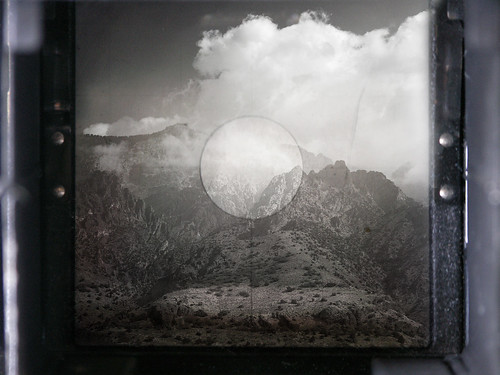
Here is another take on the technique of creating a Through-the-Viewfinder image in Photoshop (previous example here). Sometime soon, I need to take one of my antique cameras out and try this technique for real.

Canon 5D, Canon 50mm f/1.8 lens - 1/200 second, f/5.6, ISO 100

Saturday, January 05, 2008

Flower Girl


Here's a little bit of warmth for this cold winter day.

Canon 5D, Canon 24-105 f/4L lens - 1/100 second, f/10, ISO 100

Friday, January 04, 2008

Big Headed Spidey


Here's a different take on yesterday's Wide Angle Portrait technique. Instead of using the wide angle lens to create the appearance of the model's larger than life head, I found a model with an extremely big head :)

Canon 5D, Canon 24-105 f/4L lens - 1/200 second, f/4, ISO 100

Thursday, January 03, 2008

Use Wide Angle Lens Distortion for a Creative Portrait


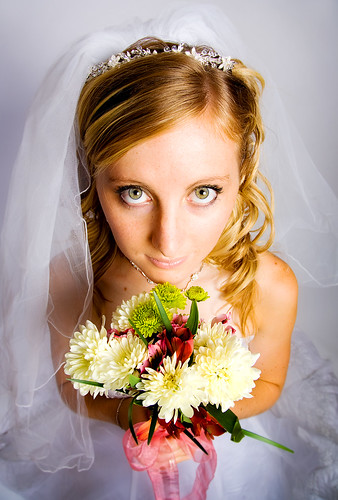
One of the fun poses I like to do when working with a model is a close-in wide angle shot taken from above the subject. The distortion created by a wide angle lens causes the subject's head to appear oversized with a small body filling the remainder of the frame. For further exaggeration of the face, I get as close to the model as possible while still maintaining focus. To be able to get over top the model, I keep a small ladder in the studio for this purpose.

On both the shot of the menacing looking gunman (above) and the little bride (below), I used my all-purpose 24-105 f/4L lens on a Canon 5D. Since the 5D has a full-frame sensor eliminating the crop-factor, I get a true 24mm in the widest focal length causing the large head effect to work nicely.


One of the lenses on my future-purchase list is the Canon 17-40 f/4L. This lens will give me even more versatility in creating this type of portrait.

Canon 5D, Canon 24-105 f/4L lens - 1/125 second, f/7.1, ISO 100

Labels:

Wednesday, January 02, 2008

Digging In


Canon 5D, Canon 24-105 f/4L lens - 1/640 second, f/6.3, ISO 100