


Digital Pinhole Camera Follow-up
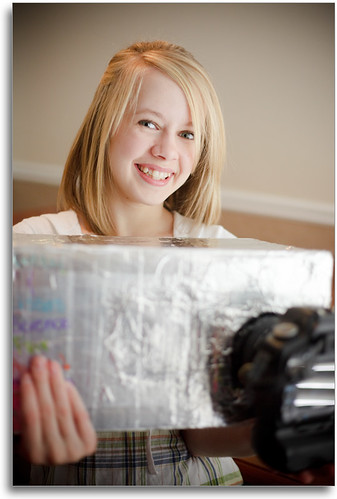
After last week's blog post about my daughter's Digital Pinhole Camera science project, I received numerous requests to see the actual camera she built. So we did a quick photo-shoot this morning to show you her creation.
The design is very simple and straightforward, a box with a pinhole in it. She began with a leftover Christmas gift box. The next step was to paint the interior flat black and attach a piece of white paper in the back to act as a screen to display the pinhole image. After doing this, she covered the whole box in aluminum foil tape to ensure that it didn't have any light leaks.
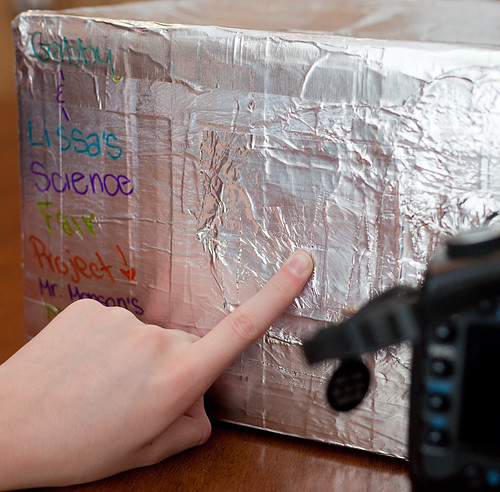
The next step was to create the lens. For this, I cut out a piece of an aluminum soda can with scissors and she carefully punched a hole in it with a needle. This small piece of metal (approx 2x2") was then placed over a hole that she cut in the front of the box and sealed with more foil tape.
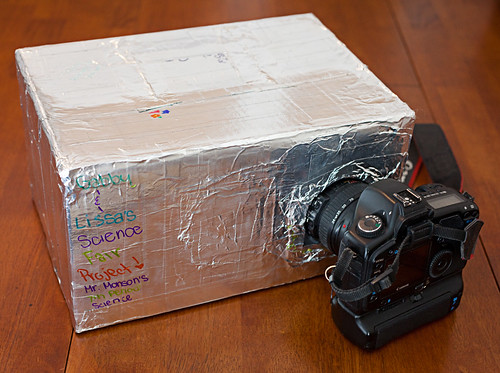
After putting the lens in place, I helped her cut a hole next to the pinhole to be able to attach a digital camera body and lens. After cutting the hole, she lined it with a rubber gasket that we made out of an old bicycle tube. The camera was placed at a slight angle to be able to capture the pinhole image projected on the back of the box. After mounting the DSLR to the box, she put foil tape around the opening to seal off any light leaks.
Once the camera was complete, she then went to work testing it out. I helped her by providing an exposure starting point, which was 30 seconds at ISO 3200 with the DSLR lens wide open at f/4. Working with a classmate, they worked on bracketing their exposure times to find out which would give the best result.
One thing she learned in testing the camera was that the viewfinder of the DSLR had to be covered. Light was entering the box through the viewfinder during the beginning of the exposure and causing problems. One other recommendation that I would add is that a sharper image could be obtained by using a smaller aperture on the DSLR, but she liked having the relatively shorter exposure times with the digital camera set wide-open.
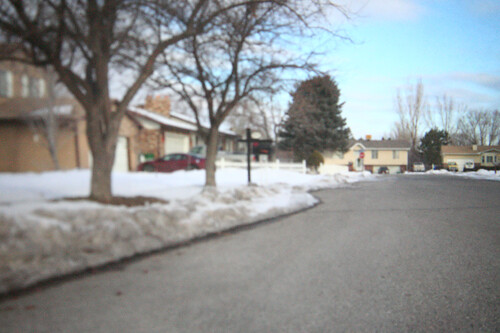
I have to admit that I had a lot of fun helping with this project. The final results were much better than I expected when she started.
One final thing that needs to be noted is the website that she found when researching the project. The page located at ScienceBuddies.org helped her with her design of the project:
http://www.sciencebuddies.org/science-fair-projects/project_ideas/Photo_p005.shtml
Labels: tutorial

11 Comments:
This is very cool Rich... great idea for a project to do with my 9 and 10 year olds.
Question.
How exactly did you get the pinhole lens in place? How big was the hole that you put the lens into?
"How exactly did you get the pinhole lens in place? How big was the hole that you put the lens into?
The pinhole lens was created with a piece of aluminum cut from a soda can. It was flattened out and then had a hole punched in it with a needle (held by pliers). The lens was attached over a hole cut in the box.
This is very cool. The picture makes the street look like a scaled model! Thanks for sharing! BTW, came to your site from DIYPhotography.
I wonder why you didn't try it without the lens on the DSLR?
"I wonder why you didn't try it without the lens on the DSLR?"It wouldn't have worked without the lens. The DSLR was focusing on the image being projected on the back of the inside of the box.
An easier, though not as fun and creative, way to make a digital pinhole is to simply make a very small diameter hole in the body cap of the camera. It is already light tight, and allows you a great deal of portability.
It works with any camera as well. I have done it with my Nikon DSLR, my old Nikormat, and my medium format caera.
For some old school fun though, nothing beats the old quaker oats pinhole camera with 35mm film (for panoramas) or 4x5 film.
Very neat idea. I take it from seeing the projects design, that a simple point and shoot digital camera with a decent macro feature could also be used. And the result may be even more "pinholey" as the smaller sensor would accentuate dept of field and noise, achieving an effect similar to the shoebox pinhole camera
I thought of doing something like this but never got round to it. My idea was to have the pinhole project the image onto a piece of thin paper and have the camera behind the paper. Don't know how well it would work but could be interesting. I made a film pinhole camera instead.
Something I did years ago was to make a room into a pinhole camera. I sealed off the window with cardboard and made a hole for a piece of opaque plastic that had a small hole drilled into it. It was fascinating to watch the reversed clouds moving across the opposite wall.
@Anonymous,
That is called a camera obscura.
Post a Comment
<< Home