


My Post Processing Technique

I have received a couple of questions about my technique in processing images. To assist in showing how I do it, I thought I'd detail the steps I took in processing a photo such as the one posted yesterday. This photo was taken on the spur-of-the-moment when Michelle walked by. I was playing with a soft-box and asked her to stop and pose for the shot. I am self taught in all of my post-processing so I am sure that the 'pros' have better techniques, but this is what works for me.
ORIGINAL IMAGE
Here is the original image after doing the RAW conversion from the camera file:
STEP ONE
I use the CLONE tool to remove her necklace, earring holes, skin blemishes and background distractions.
STEP TWO
I apply noise reduction, slight sharpening (via Unsharp Mask) and crop the image.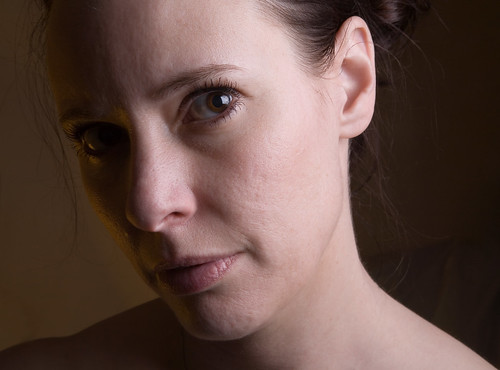
STEP THREE
I create a new layer from the background layer. I apply 48 pixels of GAUSSIAN BLUR to the newly created layer. I blend the new layer at 35% and mask the eyes to keep them sharp.
STEP FOUR
I create a CHANNEL MIXER layer and set to monochrome (70% red, 30% blue). Adjust brightness -5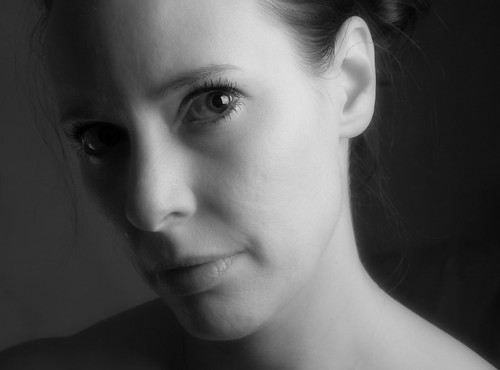
STEP FIVE
I merge my background layers, then create a duplicate of the background. I adjust brightness to -25 then mask out face (this darkens the background).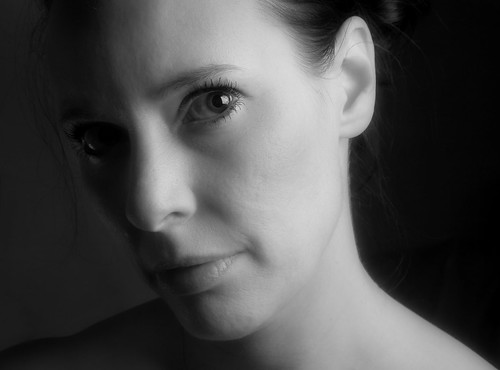
STEP SIX - COMPLETE
I merge the background layers then create a new copy of background. I apply 1.5 pixels of GAUSSIAN BLUR (smooth the skin more). I then mask out eyes to keep them sharp. Add photo filter (Sepia, 10%), Burn/dodge eye to make it more dramatic
As I said earlier, this is the process that works for me. I find as I continue to advance in post-processing that I am constantly finding new and improved techniques. If you've got some pointers, please don't hesitate to share.

5 Comments:
Well done. Have you tried the Black & White filter on CS3? I used to use the channel mixer a lot, but I've put it to the wayside since the B&W filter came along. It just gives you a little more control over the tones, but it's handy overall.
When I'm doing black & white, I'll usually throw in a couple of low-fill blends to give the photo a little more depth. But all this depends on the photo and the feel you're going for. Not sure if it would work well in this one.
I think you've done a great job with this photo -- real smooth with soft transitions, and the lighting is just great! Nice work, and thanks for sharing.
Thanks for sharing.
>STEP TWO
>
> I apply ... slight sharpening ...
I've heard from several places that sharpening should be the last step. Not sure why; never heard a explanation. Have you heard this or know why?
> slight sharpening (via Unsharp Mask)
Is Adobe taking lessons from Microsoft? (Sounds like clicking the Start button to shutdown the computer.) ;-)
Good catch on the sharpening, Harley. The reason I did it on that step was that I was going to be creating blurred layers overtop and merging and/or masking. This was the last thing I was going to be doing on that particular layer.
Use the unsharp tool to sharpen... yeah, I never quite got that either.
Wow, that's cool.
Thanks for sharing your technique! I like the effect it has. I'm always looking for a good B&W conversion. I hate relying on actions for everything.
Post a Comment
<< Home