Photoshop Tip: An Alternative to Unsharp Mask
Earlier this week, I mentioned my recipe for having a high percentage of my photographs accepted into my portfolio on istockphoto.com. One of the key ingredients to my system is NOT using the popular UNSHARP MASK filter in Photoshop for sharpening. While this filter does a nice job for sharpening images to be printed, I find that it can be detrimental to the quality of stock photos which get inspected with a fine-tooth-comb before begin accepted.
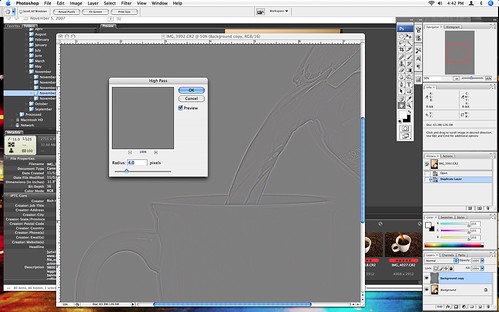
The alternative method I use for sharpening is the HIGH PASS FILTER method. This method provides good sharpening while minimizing image degradation. Here are the steps:
1. Create a COPY of the layer you wish to sharpen
2. Select FILTER, OTHER, HIGH PASS
3. Set the radius to 4 PIXELS (then click okay)
4. Change the blending options of the new layer (by double-clicking on the layer) to SOFT LIGHT for mild sharpening or OVERLAY for stronger sharpening
It's a very simple method for clean sharpening of photos. To make it even easier, I have recorded the steps as an action that I can run with the press of one function key.
If you haven't tried sharpening this way, give it a shot and see how well it works for you.
Additional Note (Added on 15 November)
In response to a comment about this method causing an undesired "HALO" effect, let me add a clarification (that I should have included originally). This method is intended to be used on FULL RESOLUTION images of 8+ megapixels. Using it without tweaking the 'RADIUS' on smaller images will give an undesired result.


9 Comments:
Hi from a complete stranger---I check out your blog 5-7 times a week though, and have learned a lot. THANKS so much for posting this photoshop tip, I've been looking for an unsharp mask alternative!
I am in the process of writing an article about using the high-pass filter and curves for replicating the punch and saturation of Fuji Velvia. I will be sure to reference your tip as another use for the high-pass filter. Great tip.
I used to be a contributor to iStockPro before the got bought and shut down by Getty. I never did transition over to iStockPhoto because I felt it unfair to have to go through the application process again when the companies were one in the same. Maybe I'll finally get back into the stock photo game again.
FWIW, Corel's Paint Shop Pro XI has a "High Pass Sharpen" menu item. Same options as doing it this way (radius, mode and strength) with a few less clicks.
I've found this has and unwanted side-effect opposite to using the unsharp method. Where too much unsharp can cause ghosting around the light areas, too much high pass sharpening can cause ghosting around the dark areas.
Thank you for sharing. A friend of mine showed me this trick a couple of years ago, and I had forgot how to do it.
Well, I tried it but it seems to leave a definite light halo along any contrasty edge -- just the kind of halo that I try very hard to avoid in using unsharp mask -- just the kind of halo that shrieks "oversharpened!" in so many web pix...
"Well, I tried it but it seems to leave a definite light halo along any contrasty edge -- just the kind of halo that I try very hard to avoid in using unsharp mask -- just the kind of halo that shrieks "oversharpened!" in so many web pix...
This probably happened because the image it was being applied to wasn't full-resolution. On an image that has been downsized, the effect will appear overdone.
Try it on a full size image (8+ megapixel) and you should see nice results without the halo.
I've always used Unsharp Mask up until now, because that is what everyone else always said to do. Tried this after hearing you talk about it yesterday and PhotoCamp Utah and it works awesome. Thanks for the tip!
Nice post with very good advice! Keep up the good work!
Terry Day
Good post! Thanks!!!
Post a Comment
<< Home