Cross Lighting In Studio
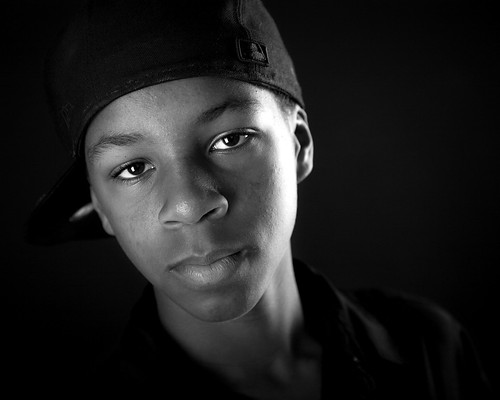
I spent some time yesterday with a couple young men in the studio. My goal going in was to shoot them with serious expressions against a dark background.
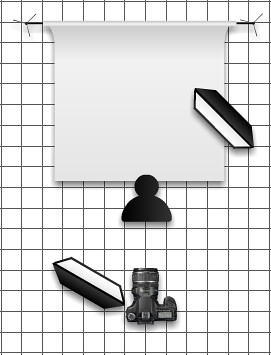
In today's image of Ryan taken during the session, I used a cross lighting type setup (diagram below). The arrangement consisted of a of a softbox camera left lighting the model's right side and a second softbox on the opposite side of the model lighting his back and left side. 
I like the results achieved. If I were to do the shoot again, I would lower the power on the back light a small amount. Even though the detail was retained on the side of Ryan's face in the original image, I lost detail and blew out the highlights a bit in processing.
Canon 5D, Canon 24-105 f/4L lens - 1/160 second, f/4.5, ISO 100
Labels: tutorial


4 Comments:
I love this effect Rich. Thanks for sharing the setup.
Is there anything you can do for separating the left edge of the hat?
Very well done, Rich, always a pleasure to see your behind-the-scenes graphic, too.
I agree with your self-criticism on the light balance, maybe as Udi notes you can splash some of that distant softbox's light onto the backdrop?
@Udi and Calandan:
Yeah, I agree about the left side of the frame needing a bit of light. I think a white reflector placed to the left of the model would have provided a subtle amount of reflection to rim the brim (hey, that rhymes!) of his hat.
@tucker o'brien
Thanks for the comment. I created the diagram with the web tool found at this site:
http://www.professionalsnapshots.com/PhotoDiagram/
and then made a screenshot.
-RL
Post a Comment
<< Home